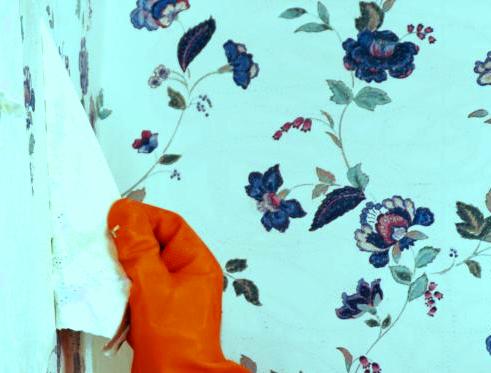
Sometimes, you get to that point where you have to come to terms with the truth and admit it, not just to yourself, you say it out loud, “This wallpaper is ugly,” so you finally resolve to take it off instead of ignoring it.
Choosing A Wallpaper And How It All Went Wrong
You probably didn’t make the choice right from the onset, maybe you met it there on the wall when you moved in, or your land lord wants you to take it off when you leave. In a few cases, I’ve been contacted by some persons to take off a wallpaper just because it reminded them of someone whom they wanted to forget, whatever be the case, the wallpaper must come down.
But admitting it is not just where the problem lies, the challenge is in the ability to take off the wallpaper without damaging your wall. You may need to consult a professional wallpaper remover, in some cases, some professional painters are up to the task, however, for some awesome DIY freaks out there, say no more as we’ll be providing some easy DIY tips to guide you as you make a decision on the most favourable wallpaper removal process.
[irp]
According to my Interior Decorating mentor, Nkata Nkata Kalu, “A lot of persons have no idea on how to install a wallpaper, a higher number of those persons have no clue on what it takes to strip a wallpaper off, especially because they’re to scared of destroying the wall. What they haven’t realized is that It’s not that difficult. But it takes a lot of patience, and there’s an art to stripping wallpapers.”
The process involved in taking down a wallpaper often depends very much on the type of wallpaper that you have on your wall. While some other wallpapers can be stripped while they are dry, some others require the use of some form of solution. If there will be damages, then this could be as a result of how the wallpaper was installed in the first place.
Although we earlier published an article on how to install wallpapers after a lot of our readers had realized the massive difference between the use of a paint and a wallpaper, we did give justice to the post by giving the easiest tip in the bag, that doesn’t mean there aren’t other ways to hang wallpapers on your walls.
[irp]
For example, due to the inability of getting a primer easily, it becomes harder to take off a wallpaper from a wall without some damage as the primer creates a thin protective film between the wall and the wallpaper.
[irp]
Below are a few ways in which you can remove old wallpapers from your interior:
Using a Steamer To Remove Old Wallpapers:
Electric steamers have been in existence for over 25 years, they help to remove wallpapers by creating some form of steam which helps to weaken the strength of the adhesive which was used to hang the wallpaper.
With a steamer, all you have to do is release some steam on the surface of the wallpaper, inch-by-inch, while also peeling the wallpaper off with another hand. The only downside to this process is that it can be sow and exhausting, and in a few events, you can get your fingers scalded.
Using Hot water To Remove Your Old Wallpapers:
This really isn’t the best method, but it is the traditional method of removing a wallpaper. In this process, you will have to look out for a loop hole, a space which was poorly attended to during the installation process. That will be your way in.
Use a flat pen-knife to widen the hole so as to form a little air bag inside, make sure you do not perforate the wallpaper at the bottom end.
Now pour in some hot water into the air bag, gently and carefully, and wait for the water to perform its wonders as it seeps through the adhesive’s bond, making it weaker with every passing second. After observing that the hot liquid has gotten to the bottom, pull the wallpaper gently from your loop-hole-point. There, that should do.
[irp]
DIF By Zinsser Can Also Help You Remove Your Old Wallpapers
DIF is a very aggressive concentrated chemical solution which reacts with water. When mixed with the appropriate amount of water, DIF creates a solution that dissolves the adhesive which holds the wallpaper to the wall.
To use this formation, you will need to put a rag over your rugs, tiles, or carpet floors to protect them from bleaching off at spots where the solution can spill on. Next, you will need to test a small portion of the wall, just about a 3′ x 3′ section, by lifting an edge of the wallpaper. You will have to determine what the grain is. Then have it stripped left to right, up and down, or whichever position you think will be comfortable and idea.
In a few rare cases, if the wallpaper doesn’t come off easily, spray the remover-solution mixture on the area and let it soak into the wallpaper. You may need to apply it several times. In the event that the mixture isn’t seeping through the wallpaper as well as it should, use a scoring tool to make tiny holes in a circular. This will enable the mixture to saturate the wallpaper and its backing quicker.
[irp]
However, I would love to inform that the use of the scoring tool should be a last resort, as it really puts the wall at great danger of getting damaged.
After the process of removing a wallpaper, repeatedly spray the wall with the mixture at some select spots a few more times and scrape off any missed spots. Then, wipe down the wall with a moist sponge and let it dry for a few days